How to Create a Shopify Customer Segment and Audience for Purchased Products
Managing customer data in Shopify is crucial — especially if you want to send out specific marketing or run ads only to people who bought a certain product. Maybe you want to follow up with folks who grabbed those Black Doc Martens from your shop. If you’re wondering how to build a segment for that, and turn it into an audience for targeted ads, you’re in the right place! In this blog, we’ll walk you through the full process, step by step, right inside Shopify’s admin.
Table of Contents
- •Introduction
- •Getting Started: Accessing Customers in Shopify Admin
- •Segments 101: What They Are and Why They Matter
- •Step-by-Step Guide: Creating a Customer Segment for Purchased Products
- •Filtering: Narrowing it Down to Product Purchases
- •Running the Segment and Saving It
- •Turning Your Segment into an Audience for Ads
- •Configuring and Syncing Your Audience
- •Common Issues and How to Avoid Them
- •Extra Tips for Advanced Users
- •Wrapping Up
Introduction
Shopify is more than just an online store. It’s a platform that helps you keep track of your customers and talk to them in exactly the right way. The segments and audiences features make it easy to target people who’ve bought specific items – like, say, those classic black Doc Martens. Whether you’re new to Shopify or you just haven’t touched the “Customers” tab much, this guide will get you sorted.

So why care about segments and audiences?
- •Reach out directly to high-value customers
- •Save money on ads by targeting buyers, not just browsers
- •Build loyalty with follow-ups, special deals, or new product launches
Let’s get hands-on and make this work for you!
Getting Started: Accessing Customers in Shopify Admin
First things first. Everything starts inside the Shopify admin panel.
- •Log in to your Shopify store.
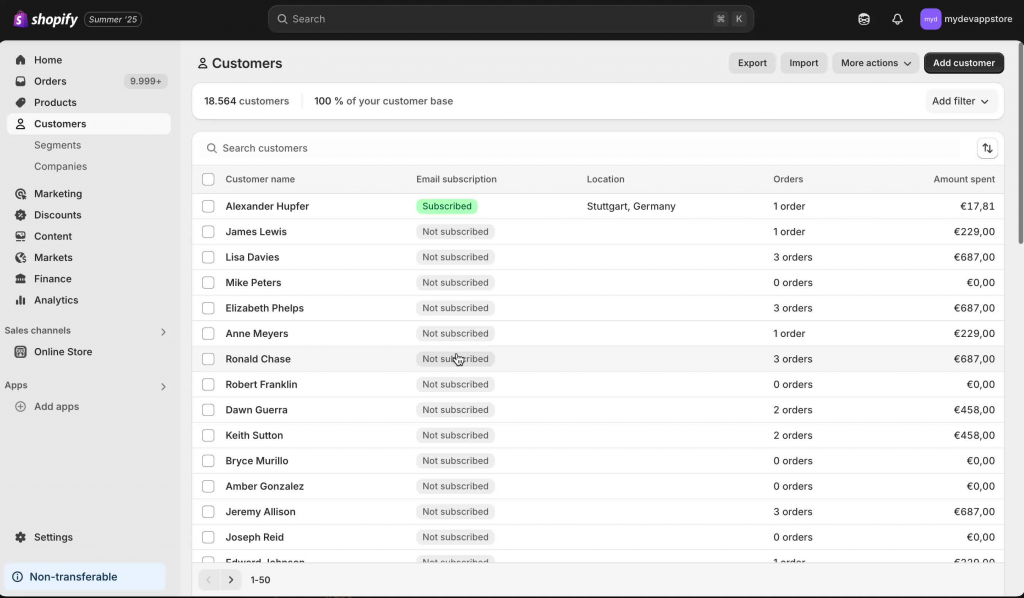
- •Go to the “Customers” section.
- •This is where you’ll find everything you need about past purchasers, leads, and everyone who’s interacted with your shop.

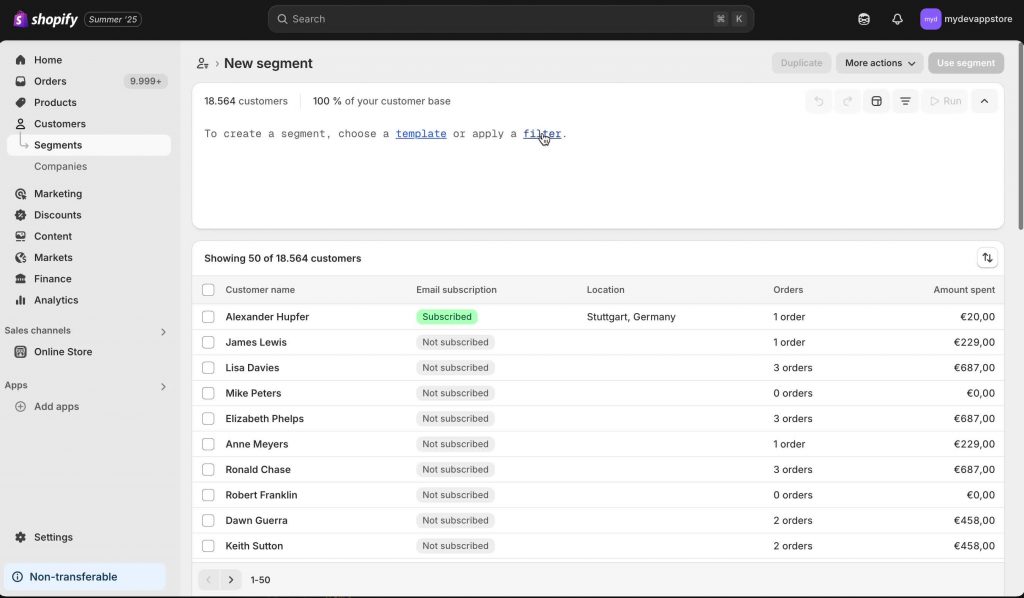
Screenshot of the Shopify admin dashboard highlighting the Customers tab.
Segments 101: What They Are and Why They Matter
Before we dive into clicks and filters, let’s talk quickly about segments.
A segment is just a group of customers that match conditions you set — like people from Chicago, or people who bought your Black Doc Martens. Segments are dynamic, meaning new people get added automatically if they match your rules.
So whenever you make a new segment, you can always adjust or fine-tune it later.
What Can You Do With Segments?
- •Email marketing. Send messages only to these people.
- •Ad audiences. Build lists for retargeting on Facebook, Instagram, and more.
- •Reporting. Check how certain customers perform compared to others.

Visualization of customer segments and various actions you can do with them: Email, Ads, Insights.
Step-by-Step Guide: Creating a Customer Segment for Purchased Products
Let’s get into the meat and potatoes — actually building a list of everyone who bought a specific product, like those Black Doc Martens.
Step 1: Find the Segment Builder
- •Inside Customers, go to the “Segments” tab.
- •Click Create segment.
Screenshot of the Shopify Customer Segments area, with the “Create segment” button highlighted.
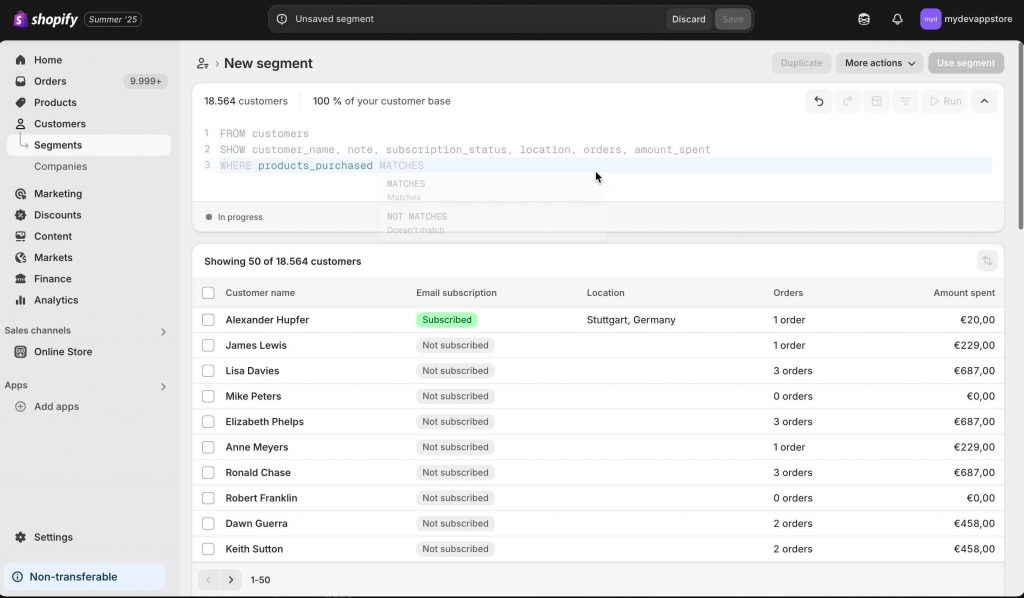
Step 2: Use Filters to Define Your Segment
You’ll be greeted with options to add filters (think: rules) to your segment. This is where all the magic happens.
- •Start with filter.
- •The magic words here are product purchased.
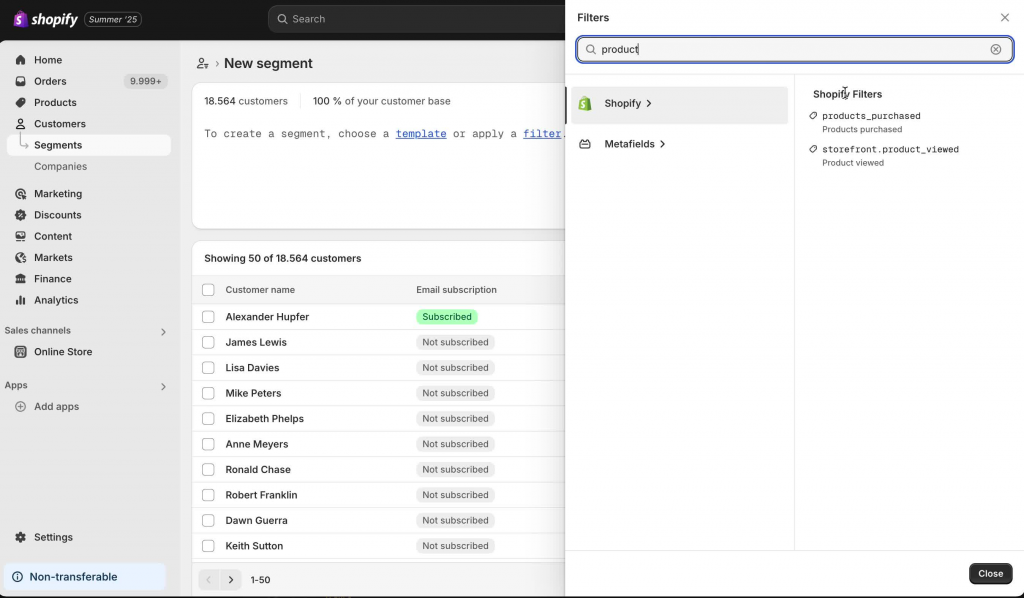
How to Filter for a Specific Product:
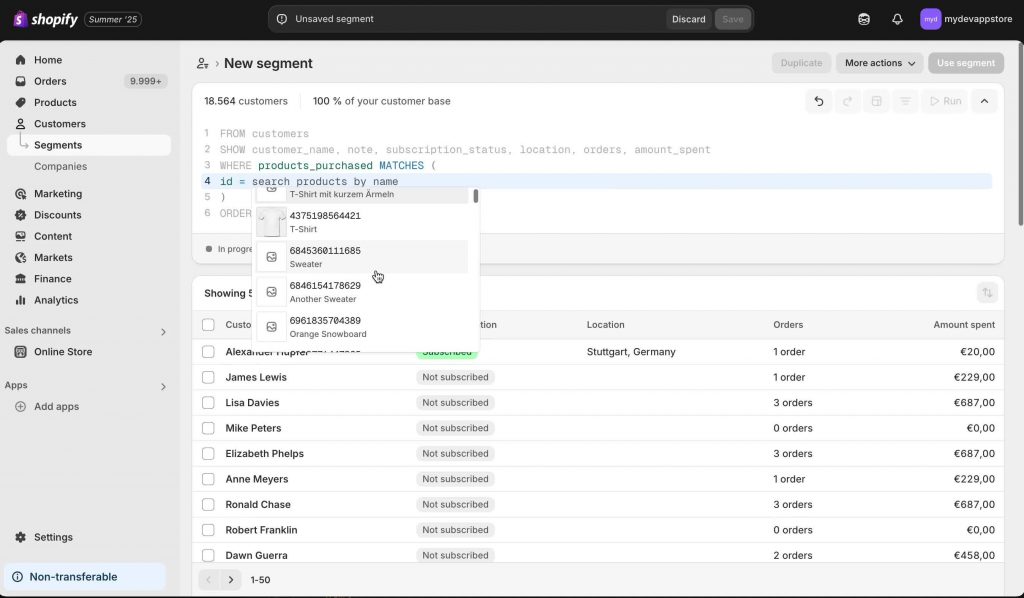
- •In the segment builder, select or search for “Product purchased”.
- •Specify the product you want (e.g., “Black Doc Martens”).
- •Make sure the product name matches exactly as it appears in your store.
Pro Tip: Pay attention to punctuation and colons when typing product names — Shopify can be fussy about matching names.

A close-up of the filter builder with “Product purchased: Black Doc Martens” entered.
Filtering: Narrowing it Down to Product Purchases
Sometimes your filters might need to be even more specific — maybe you want only people who bought in the last 3 months, or bought more than once. You would add extra conditions in the segment builder like so:
- •Date purchased: Choose recent transactions
- •Order count: Minimum/maximum order quantities
For now, since we’re focusing on everyone who bought Black Doc Martens, you can just keep it to that one filter.
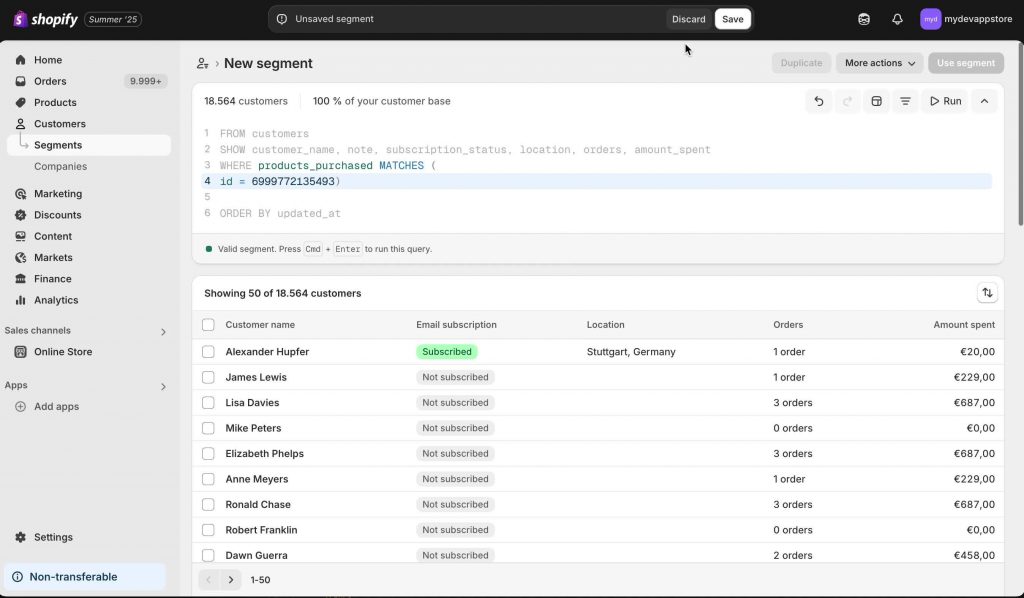
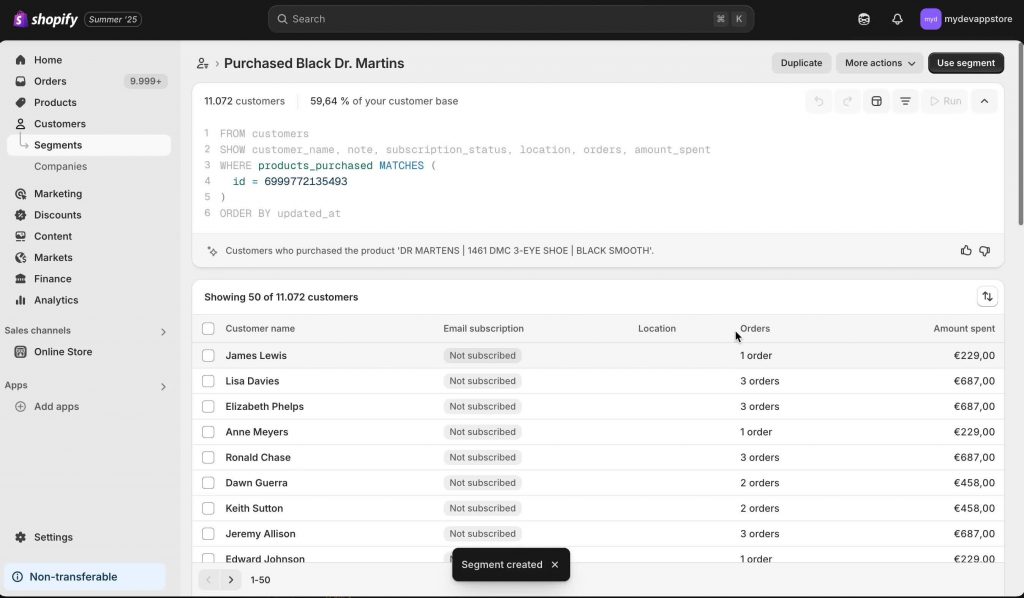
Checking Your Filter
At this point, you should see the list fill up with customers who fit your filter.
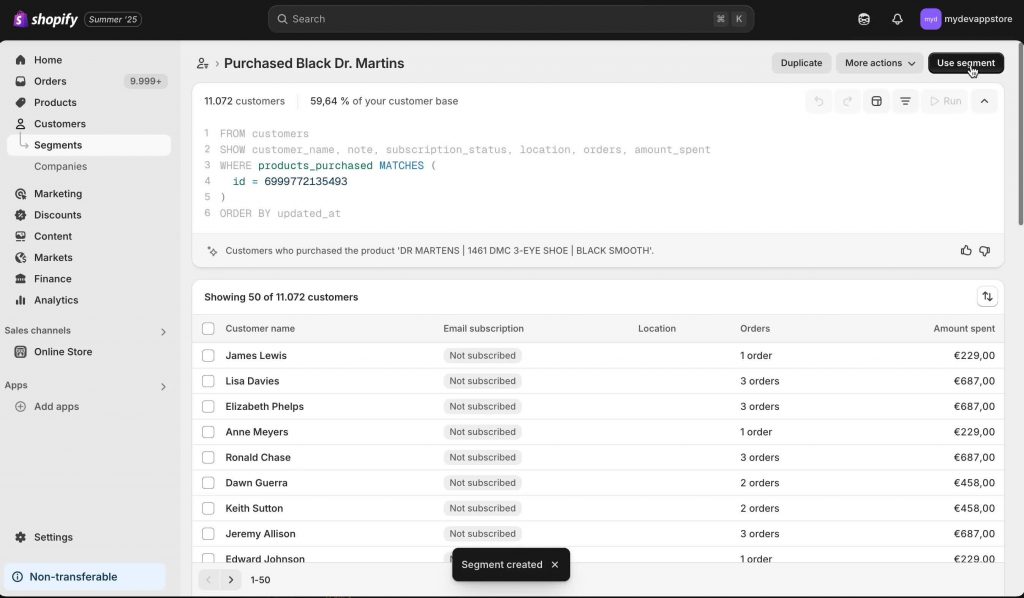
Screenshot showing a list of customers matching the “Black Doc Martens” purchase filter.
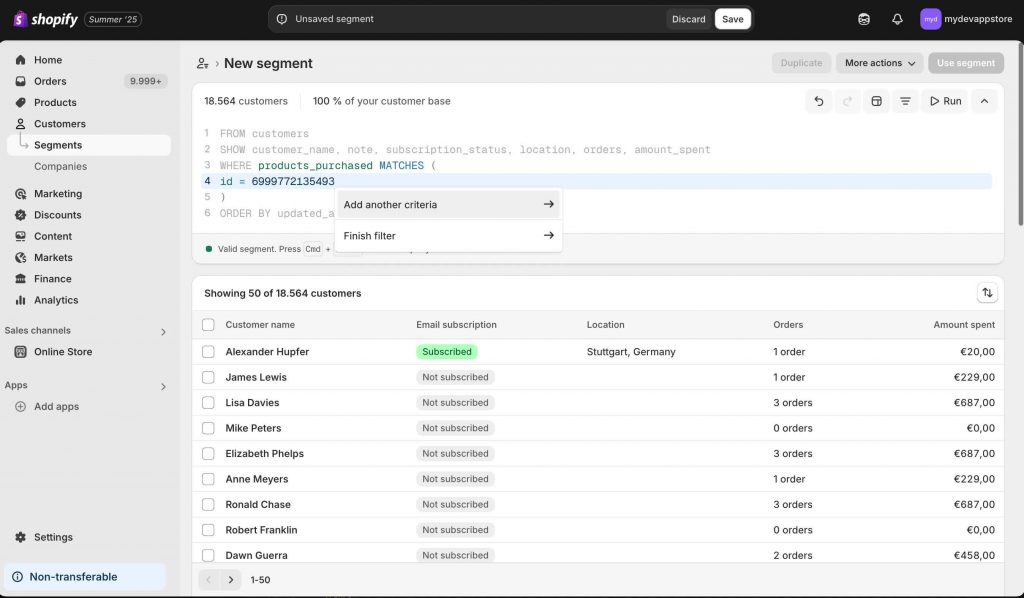
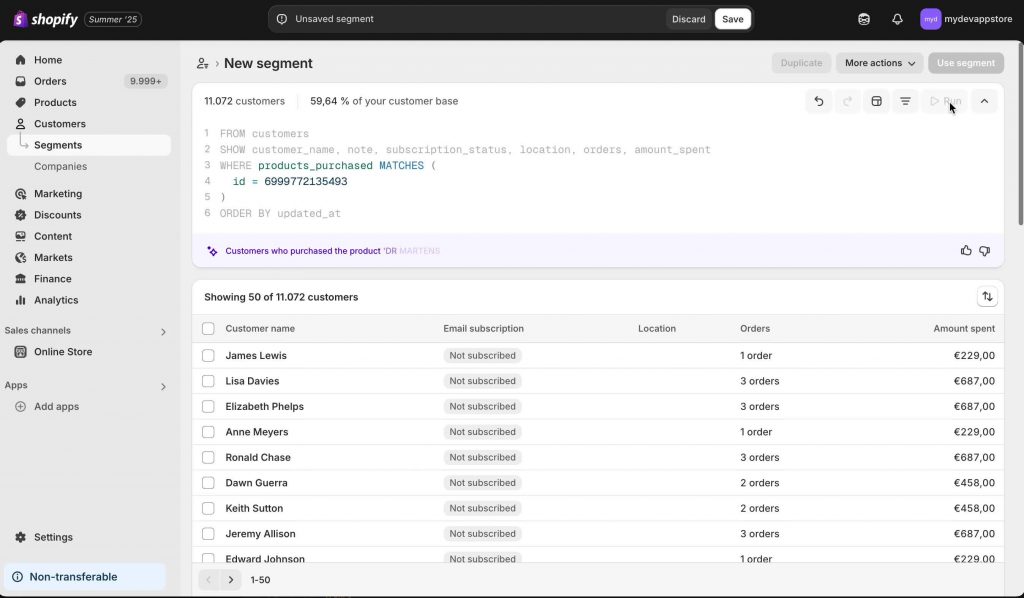
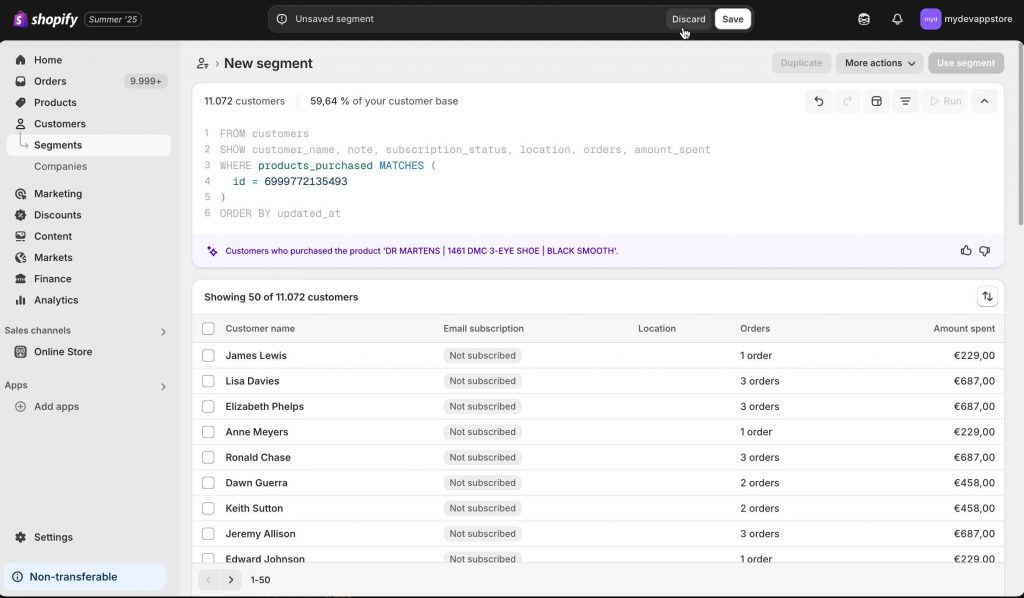
Running the Segment and Saving It
Once you’re happy with your setup, it’s time to save.
- •Hit the Run button to see your filtered list in action.
- •Review the customers shown — make sure it looks right.
- •Double-check for accidental extra filters or missing names.
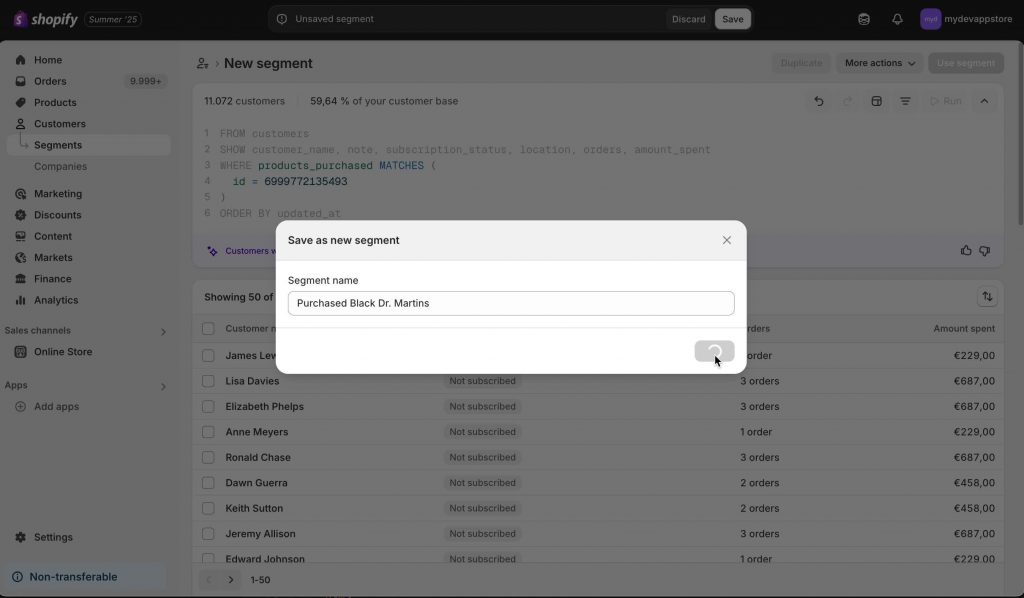
- •Click Save.
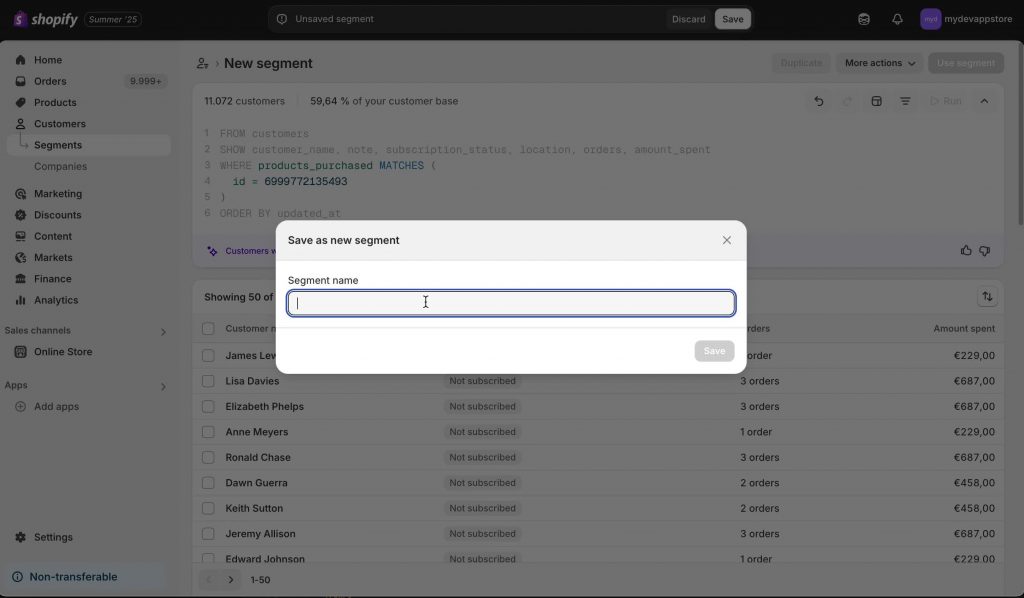
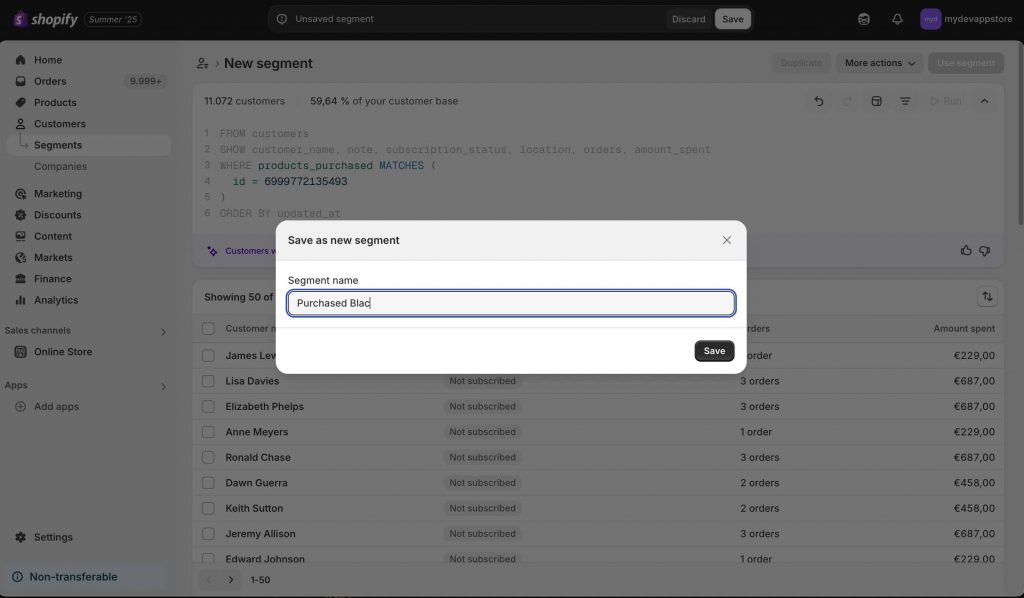
Give your segment a name you’ll remember later, like:
- •“Purchased Black Doc Martens”
- •“Doc Martens Buyers”
Screenshot of the “Save segment” dialog in Shopify, with the name entered as “Purchased Black Doc Martens”.
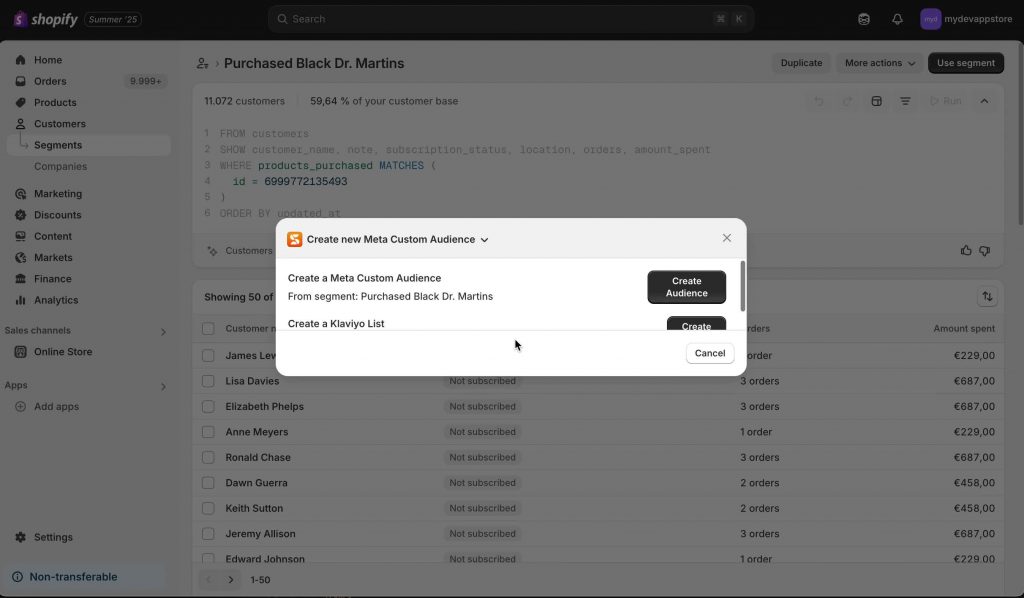
Turning Your Segment into an Audience for Ads
For this step we are using Syncmatic – our Shopify app that allow us to use Shopify Customer Segments as a source for Meta Custom Audiences
Now you have a tidy segment — what next? Time to use that group in an ad campaign!
Shopify lets you send customer segments to external apps like ad platforms. In this example, we’ll look at using Synmatic (though the steps are similar for other integrations like Meta/Facebook).
Step 1: Use the Segment
After you save, you’ll see an option like Use segment.
- •Hit Use Segment.
- •Pick your connected ad platform (e.g., Synmatic).

Illustration or screenshot showing the “Use segment” button and available ad platforms.
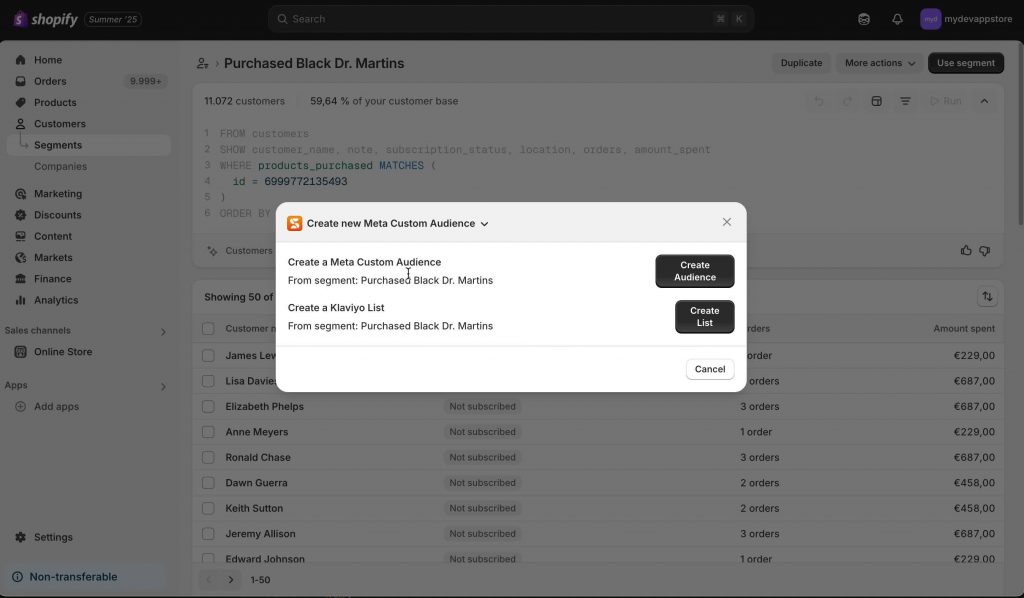
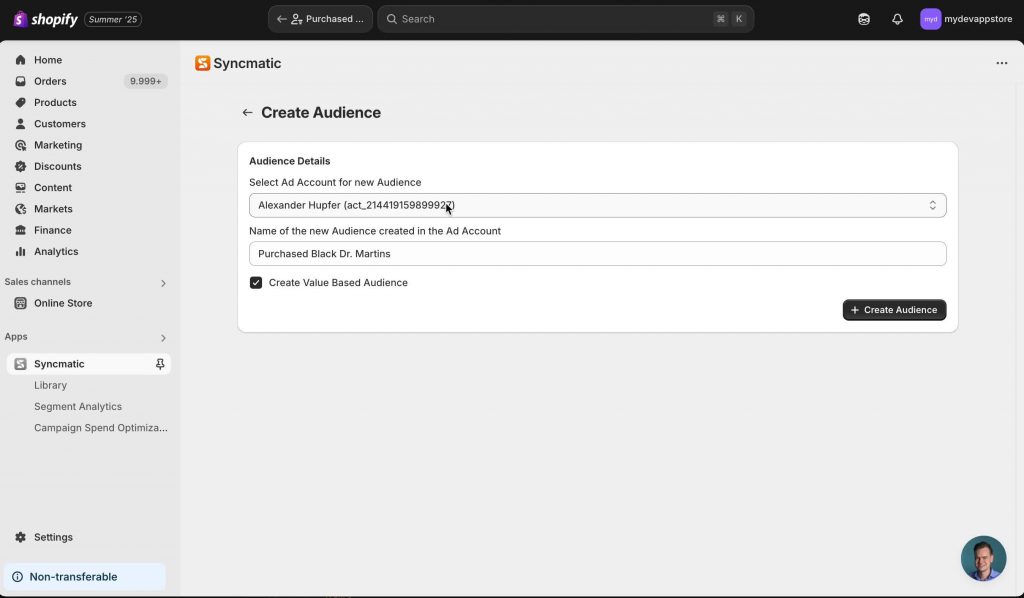
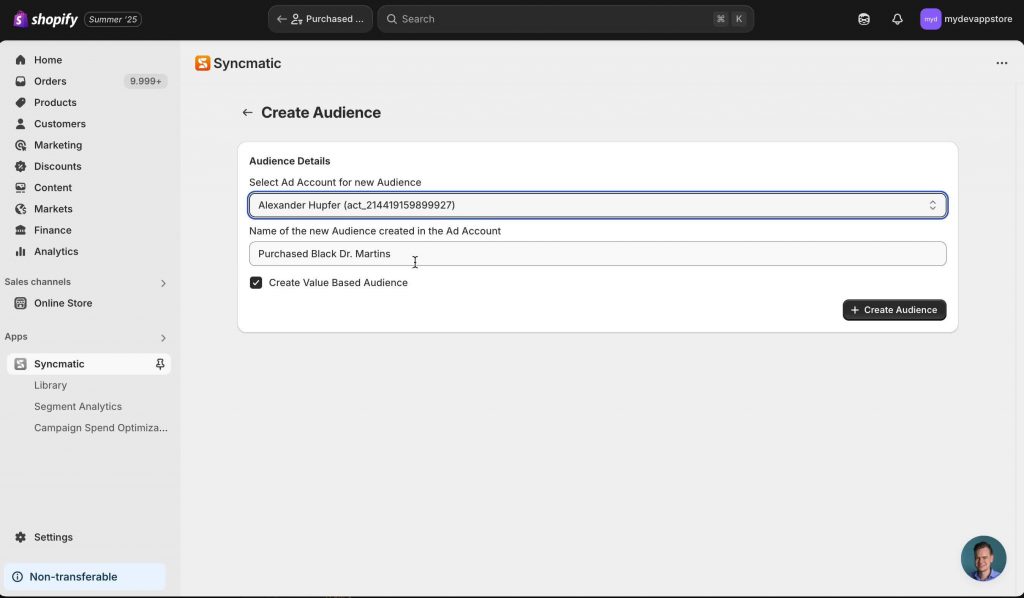
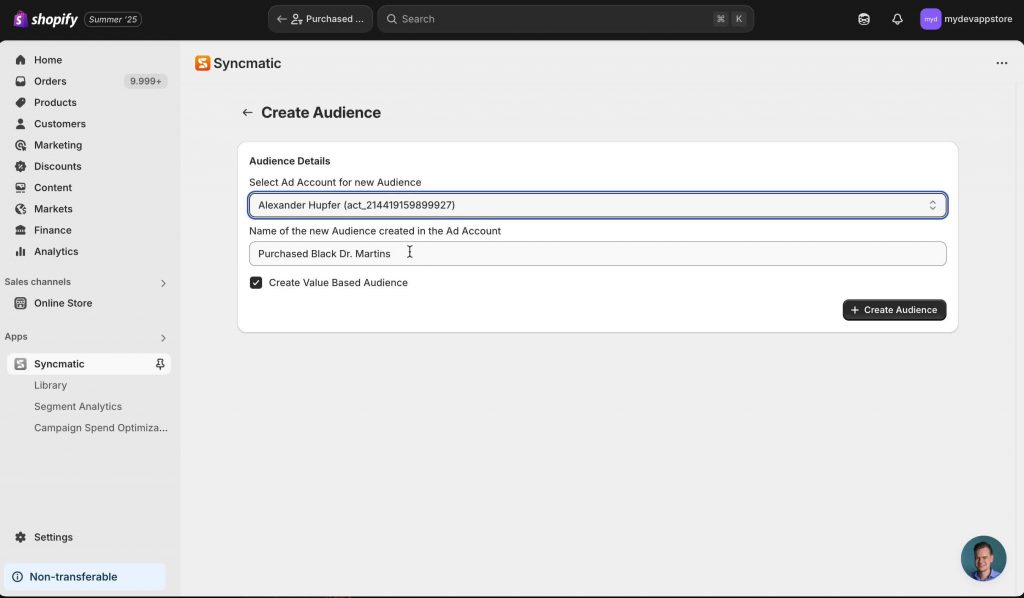
Step 2: Create an Audience
You’ll be guided to name and set up your new audience.
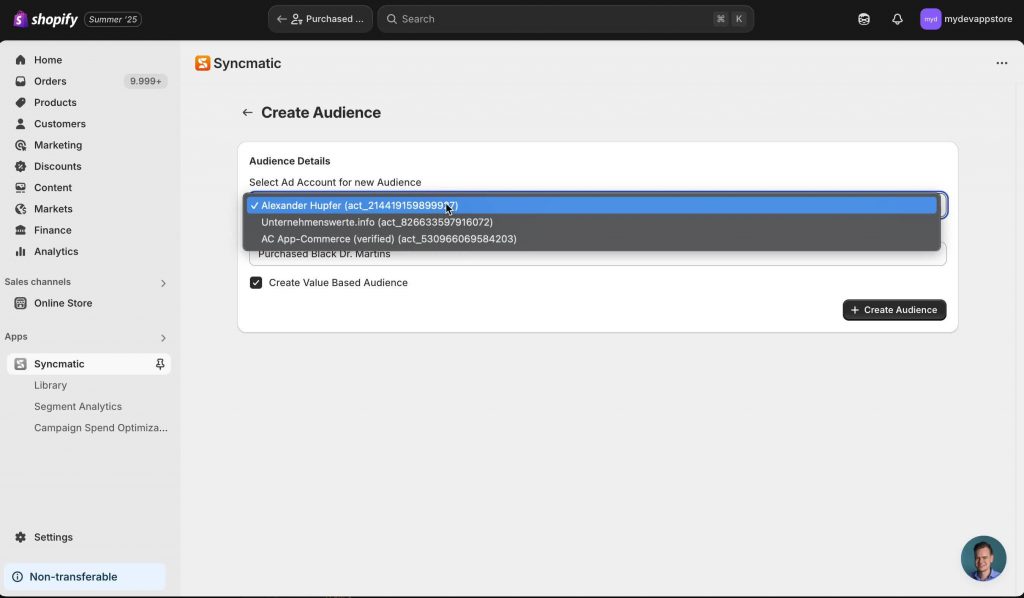
- •Make sure to choose the correct ad account (if you have more than one).
- •Name your audience — it’s handy if you match the segment name.
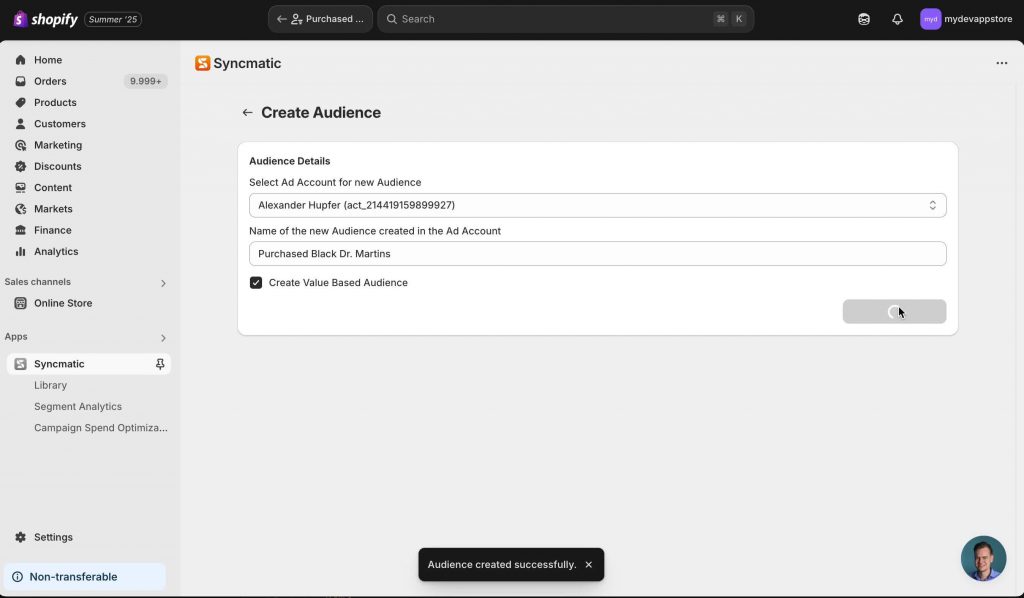
“So make sure to choose your ad account and you can customize the name here. This is a create audience.”
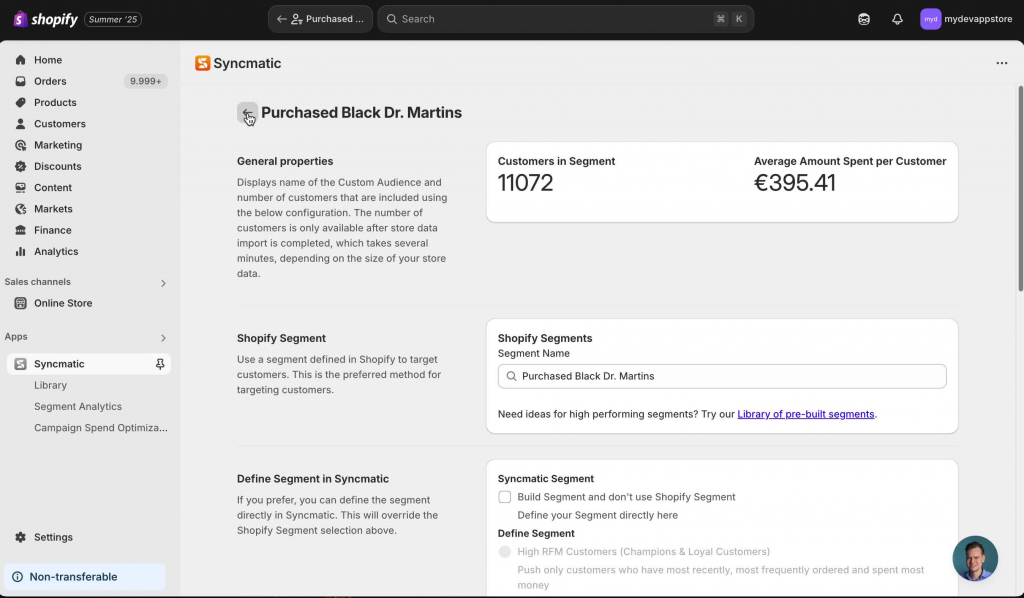
Screenshot of the interface where you configure your new audience, picking the ad account and naming the audience.
Step 3: Configure and Link the Audienc
You’ll reach a “Configure” or “Set Up” screen. Double-check the source is still your segment:
- •Confirm the correct segment is shown under “Source” or “Criteria”.
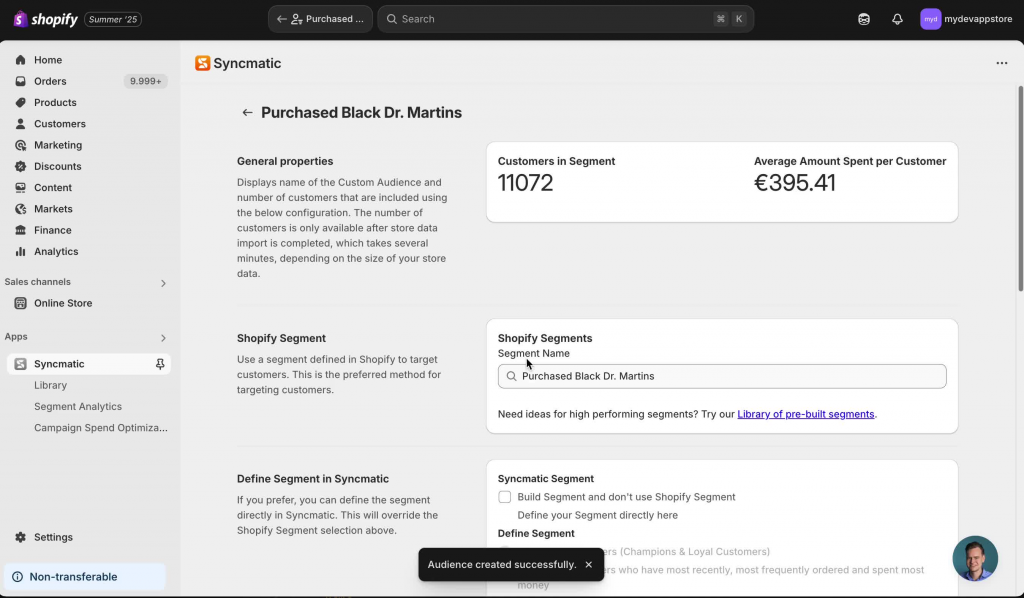
Highlighted settings screen showing �“Purchased Black Doc Martens” as the data source for the new audience.
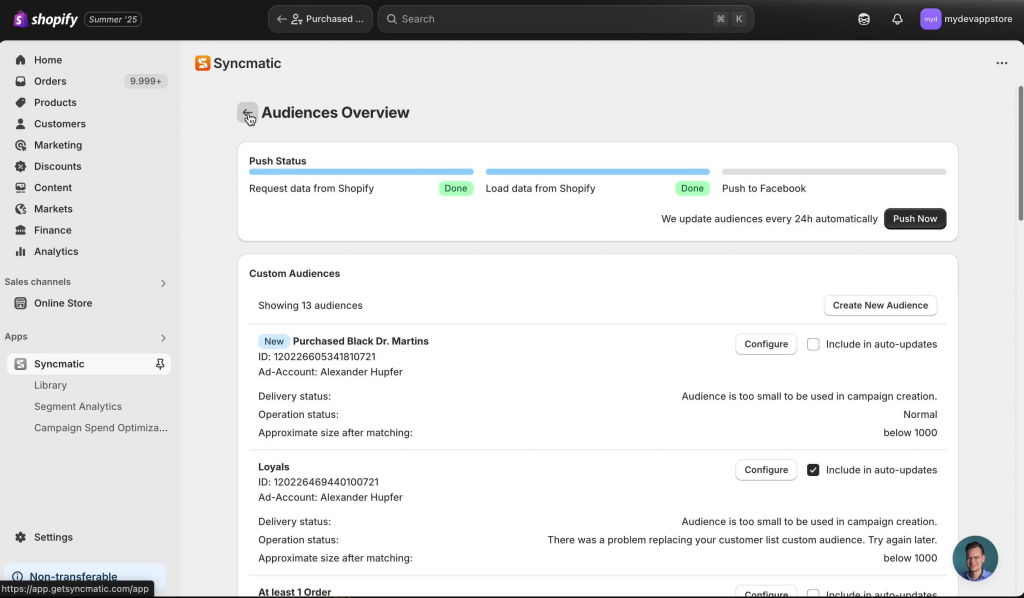
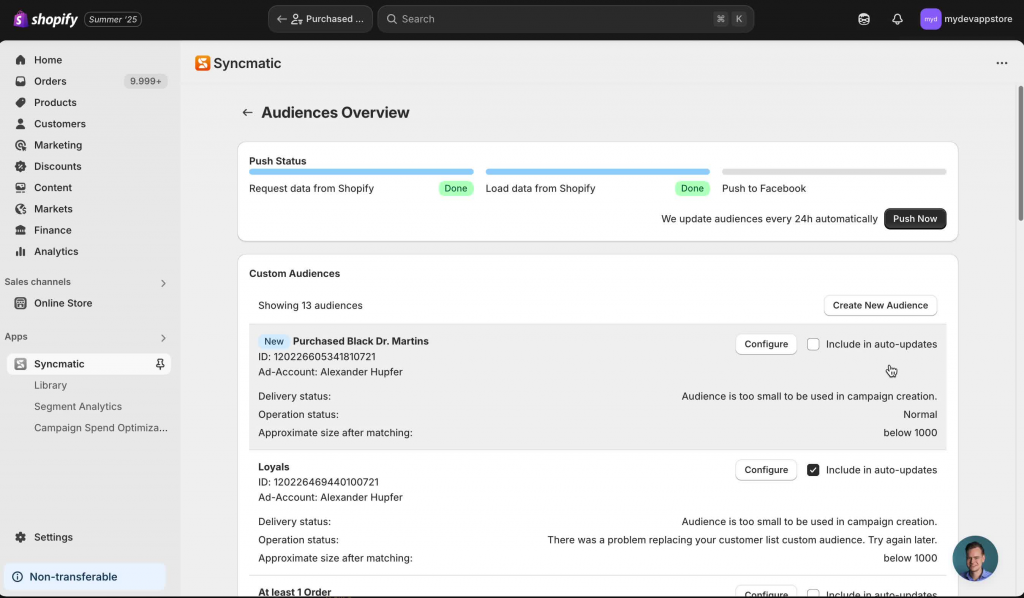
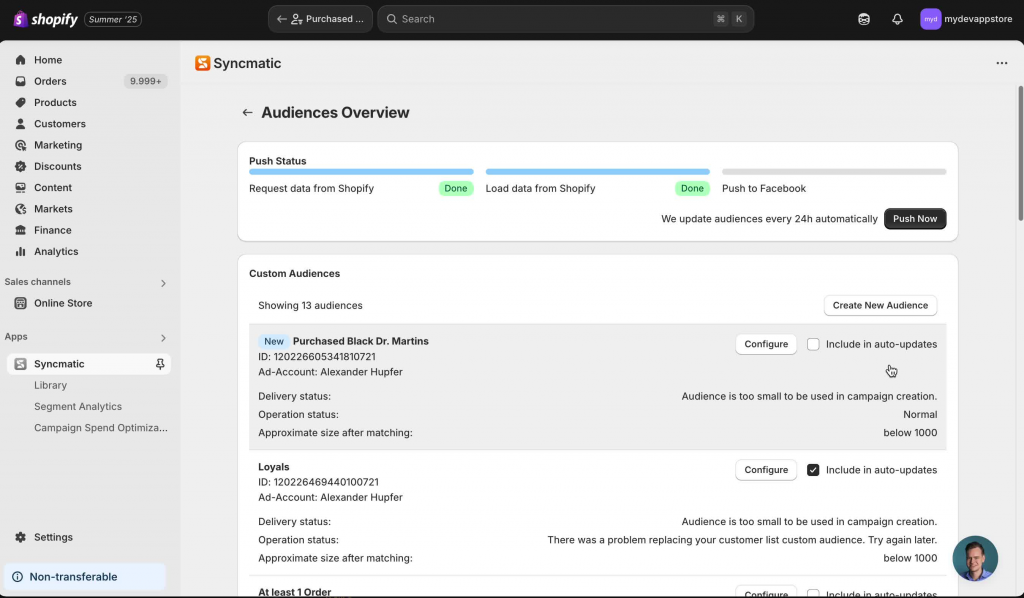
Configuring and Syncing Your Audience

Almost there! Now, you can either set your audience to sync automatically, or you can push it manually.
Sync Options
- •Enable audience sync (toggle on if needed)
- •Either push now (immediately sends customer data to the ad platform)
- •Or, leave it to sync on a schedule (some apps update daily or hourly)
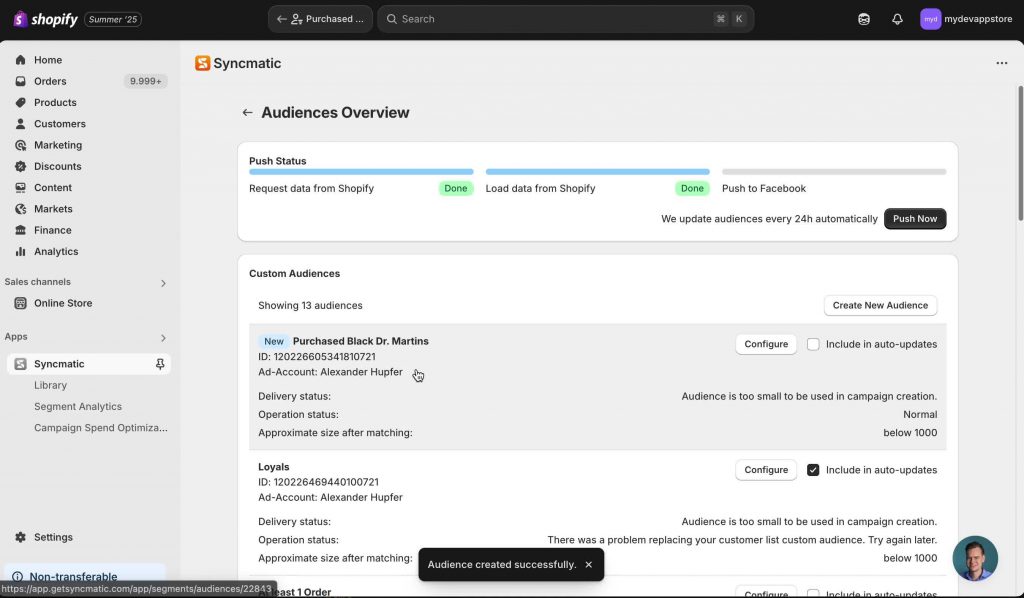
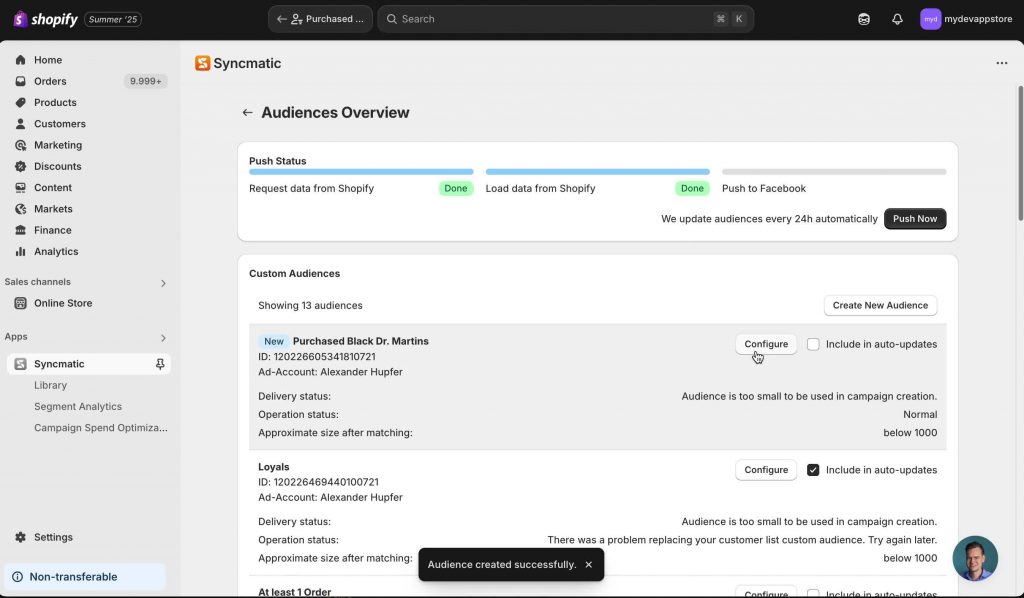
Visual mockup of the final “Enable” or “Sync” toggle, with options for “Push Now” or “Scheduled Sync”.
Common Issues and How to Avoid Them
While the process is pretty straightforward, here are a few common tricky spots:
1. Product Naming
- •Make sure the product name you use in the filter matches exactly what’s in Shopify.
- •Watch out for extra spaces, titles, or punctuation.
2. Empty Segment
- •If you run the segment and see zero results, double-check:
- •Are you using the exact product name?
- •Did customers actually buy that product?
- •Is your store filtering to the right time range?
3. App/Ad Platform Sync Problems
- •Make sure your ad account is connected to Shopify and is the one you actually want to use.
- •Some platforms can take a little while to sync — be patient, or check your integration logs.
Extra Tips for Advanced Users

Want to take things further? Try these tweaks:
Combine Filters
- •Target “Doc Martens buyers in the last 90 days”
- •Send campaigns to “Boot buyers who spent over $150 total”
Use Automatic Workflows
- •Set up automated emails to your segment (“Hey, pair your Docs with our new laces!”)
- •Trigger reminders or loyalty rewards
Reuse and Adjust Segments
- •Duplicate existing segments for new products
- •Use combined segments for cross-sell campaigns
Example flowchart showing how segments can feed into different campaigns, emails, and ad channels.
Wrapping Up

That’s it! You’ve now got a segment for everyone who bought those Black Doc Martens, and you’re ready to turn that group into an ad audience or email campaign, all from right inside Shopify. Here’s the big takeaway:
“Segments and audiences let you talk to the right customers without wasting time or money.”
Building these workflows not only streamlines your marketing efforts but also helps you genuinely connect with your most loyal shoppers.

If you haven’t explored Shopify’s segments and audience features yet, now’s the time. Set up a few for your most popular products — you’ll thank yourself later.

A celebratory image: confetti over a Shopify dashboard, customer list with checkmarks, and an ad campaign launch graphic.
Bonus: Best Practices Checklist

Here’s a handy summary to pin on your wall or bookmark:
- •[x] Start in Customers > Segments
- •[x] Use filters — especially “product purchased”
- •[x] Double-check your product names
- •[x] Save and name your segment clearly
- •[x] Use “Use Segment” to pipe your group to ad tools
- •[x] Pick and name your audience for clarity
- •[x] Enable and sync to launch those campaigns
If you’re ready to dig in, jump into your Shopify admin and start experimenting. Questions or hiccups? Drop a comment below — anfaappy segmenting!